Your upcoming event may be complex, but your online sign ups don’t have to be hard to manage. Select a section below and expand each FAQ to learn more about the features and functions of ivolunteer.com. Still have questions about your account or signup sheets? Click here to get more support.
Your ivolunteer.com Home Pages
You can change the Home Page Title, Visibility / Accessibility, Unique ID (not available on the Primary Home Page), Event Display Type, Event Sort Order, and the Welcome Message.
- Home Page Title – this is the title for your Home Page. E.g. “My Organization’s Events.”
- Unique ID – is the extra part of the URL for accessing the Home Page only from the URL. E.g. “http://myorganization.ivolunteer.com/myuniqueid.” You may not modify this for the Primary Home Page.
- Visibility / Accessibility – how your home page will be accessed and how it will display. Options are:
- Tab alongside other Home Pages or URL – the home page will appear as a tab with any other home page that has this option. IF there are no other home pages with this option no tab will be visible. The page can also be accessed by its URL. See Unique ID above.
- Hidden – the Home Page may only be accessed by its URL
- Disabled – the Home Page is not available for viewing.
- Event Display Type – this defines how the events will be displayed on the page. There are several display options available.
- Event Sort Order – How the events will sort on the page.
- Welcome Message – The welcome message will appear at the top of your Home Page. Customize this to welcome your potential volunteers.
When logged in as Primary Administrator or Organization Administrator, click on the Organization menu | Home Pages tab. Here you can add and edit Home Pages.
You need to be the Primary Administrator, an Organization Administrator or an Event Administrator with Design Privileges to assign events to home pages. With the event selected:
- Click on the Details tab
- Find the Show on Organization Home Page dropdown menu
- Choose a Home Page for the event, make the event hidden, or click Select Multiple Home Pages to choose more than one Home Page you wish for the Event to show up on.
If you set a logo for an event, that Event’s logo will appear on Facebook. To do this, sign in as an Administrator and select the relevant event. Go to the Settings tab | Logo sub-tab. Press Set Logo, then either type in a link to a logo hosted on your own website, or press Select to upload an image file from your computer. Press Save after the logo is set.
If you set a logo for the Organization and there is no logo for the Event, then the Organization’s logo will appear on Facebook.
IMPORTANT: Sometimes it can take more than 24 hours for a logo that you just set to appear when you access your ivolunteer.com Home Page or on an ivolunteer.com Event page from Facebook.
You can embed a Home Page or Event Signup Sheet using an iframe tag. For security reasons, embedding is allowed only in:
- the website domain entered in the “WEBSITE” field under Organization > Organization Details > Account (for example, mysite.com)
- any additional domains added in the “WEBSITE(S) ALLOWED TO EMBED HOME AND EVENT PAGES” field under Organization > Organization Settings > Display/Layout
Please be sure to fill the “WEBSITE” field as a minimum before embedding any ivolunteer pages in an iframe.
The iframe tag has several options that you may review here. You can also search for “iframe generator” in your favorite search engine to get copy-and-paste code with the options of your choice.
NOTE: In WordPress’s Gutenberg editor, you must use a “Custom HTML” block instead of an “Embed” block to embed an iframe.
Your ivolunteer.com Database
Your database stores basic information about your volunteers such as their email address, name, street address, phone numbers, etc. It can help you manage your volunteers by allowing you to record some extra information for each volunteer, create groups of volunteers, promote events to your volunteers and even restrict Event Tasks to select groups of volunteers.
The easiest / best way is to let your volunteers do it. Whenever someone signs up for an event they are automatically added to your database. You can also manually add volunteers to the Database one at a time.
You can also bulk add volunteers to the Database. To do this go into the Database menu | Participants tab and click on the Bulk Add button. Here you can copy and paste info from a spreadsheet 50 volunteers at a time. Then click on the Add button.
Yes, you can useivolunteer.com’s powerful email capabilities to promote your Event or Organization to volunteers in your Database. Simply select one or more of your Database Groups to send it to, select when you want to send it, and then author the email. You are currently limited to five times the number of your subscription slot limit for promotional emails within your subscription. E.g. 5 times 6,000 for one year would be 30,000 emails.
Groups are a way for you to organize your volunteers the way you want. For example, you may wish to group volunteers by a skill set or a certification that they have, such as CPR certification. You could create a group titled “CPR Certified” that contains all of your volunteers who have completed CPR training.
Groups are easy to create and manage. To see how to do this, check out our training video.
You can promote your organization or events by sending an email to one or several of your groups. You can also use groups to restrict an event task.
There are two custom prompt types that will assign a volunteer to a group: DATABASE_GROUP and DATABASE_GROUP_DEFINED. Simply add one of these prompts to your event and the volunteer will be assigned. The DATABASE_GROUP prompt allows volunteers to choose which group they should be in, and the DATABASE_GROUP_DEFINED prompt will automatically assign them to a group.
Yes. After selecting the group, use the Add Members From Event(s) button and select all the events you wish to add members from.
Yes. On the Participants tab, click on the More… button next to the volunteer’s name you wish to look at. Then click on “Activity” at the bottom of their information. Here you can see all of the volunteer’s activity within the organization, including dates, times, and event names they sign up for.
Here is how to merge two participant records in your ivolunteer.com database.
- Under Database, click on the Participants tab. You can then click on a column header to sort by name or email address to help you find duplicates.
- To merge two records, first decide which is the most authoritative or frequently used. Click More… to left of the other name and then click Show or Transfer Slots.
- Next, click “Select “TO” Participant. In the next popup box, use the filter to find the participant record to transfer to. Check the box next to that record and then click OK. Finally, click the Transfer button.
No, they will still be signed up for any events they have confirmed. A Cancel ability will be added in a future release.
We have added the ability for you to add Custom Database Fields for your volunteers’ database entries. Your Database Fields are now managed in the Organization Menu > Settings tab in the Database sub-tab. Here you can see all database fields, their types, and you can now manage where they show up in your Organization. The button at the bottom of the page is “Add Custom Database Field”. These custom database fields can also be linked to Custom Prompts so that your volunteers fill out the information when they sign up. These can be used for Sports Teams, Nicknames, Registration status, Certification status, Titles, and much more.
Volunteer Help
- Visit the ivolunteer.com home page of the organization you want to sign up with.
- Click on a signup opportunity. Each open slot will have a button labeled Volunteer, Register, etc.
- Click the button for your desired slot and fill out the information. Required fields have an asterisk. Note: The organization may require you to confirm your email address the first time you sign up.
- Once confirmed, you will get an email with a link to your My Commitments page to manage your signups. Open the page in your web browser. On your phone—depending on your device and web browser—you may get an option to Add to Home Screen or Install App. If not, just bookmark the page to save it.
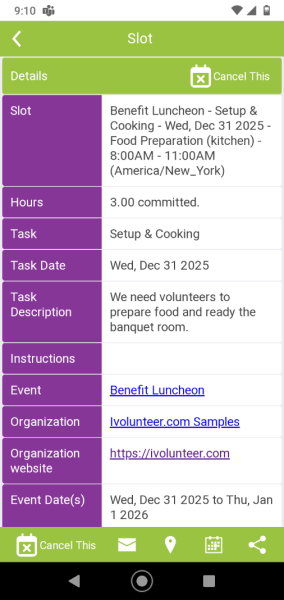
- In My Commitments, you will see a list of slots you have signed up for. Click on a slot to view and manage it. Click Past in the footer to see past signups.
- To Cancel a Slot: Click on the upcoming volunteer slot and then click the Cancel This link in the header or footer. Note: If you DO NOT see a Cancel link next to a commitment, contact the event administrator. Either the event does not allow self-cancellation or it’s too close to the date to self-cancel.
- To Print a Report: Click Report to get a PDF report of your participation for a specific date range.
- For questions about signup opportunities, contact the event administrator for the organization. For technical assistance, contact support@ivolunteer.com.
You can now opt in to text notifications in your My Commitments portal.* When you opt in, text messages will be enabled from any organization you volunteer with that has a Premium ivolunteer.com account.
To opt in, go to Settings, enter the texting phone number, and toggle the opt in. You’ll be prompted to verify with a code sent to your phone. You’ll see additional options for the types, time window, and frequency of texts.

*Currently, U.S. and most Canadian phone numbers can be opted in to receive texts.
Go to My Commitments in the browser that you used to sign up for your slot(s):
https://participant.ivolunteer.com
Click on the upcoming volunteer slot and then click the Cancel link at the bottom.
Note: If you DO NOT see a Cancel link next to a commitment it could be because:
- The event does not allow self cancellations
- OR, it’s too close to the event to self cancel.
To change your email address:
- Go to your personal volunteer page (this was the page you were directed to to confirm).
- Click the Settings button at the bottom of the page.
- Type in your new email address twice.
- Click the Save button.
Please contact your event coordinator if you need further assistance.
In your My Commitments portal, you can edit your online signup if the organization you signed up with allows it.
To modify the information you entered:
- Click on the + (plus) sign next to the commitment / slot to expand it.
- Click the Edit button.
- Make your changes and press the Save button.
Note: If you do not see an Edit button it is because self cancellation is not allowed, therefore editing is also not allowed. Please contact your event administrator if you need further assistance.
Subscription Questions
Take a look at our options here and select the subscription that will work best for your organization, or click here to get started with the free version and view our pricing options.
Instead of a Free Trial, we now offer a 30-day Free Subscription with a maximum of 15 volunteers in your database and a single Primary Administrator for your Organization. This subscription is renewable, so after your 30 days are up, you can renew your subscription right away, or you can wait and come back to it when you’re ready to renew. There is no payment information taken for the Free Subscription.
Each subscription includes a maximum number of volunteers allowed in your database with unlimited signups per volunteer. For example, the Free Subscription allows for up to 15 volunteers in your database with unlimited signups per volunteer, and is a great way to try out ivolunteer.com. The Standard Subscription allows you to choose the number of volunteers you anticipate having in your database, up to 500 volunteer database entries with unlimited signups per volunteer. The Premium Subscription allows you to choose the number of volunteers you anticipate in your database, up to 10,000 volunteer database entries with unlimited signups per volunteer. For more information on these subscriptions, click here.
Yes. We will keep your data in the system available for the next year unless you specifically ask us to remove it. When you are ready to re-subscribe, log in as the Primary Administrator as you did the previous year, go to the Organization menu | Subscription tab and select the desired subscription level. If you would like the exact same subscription level as last year, it will already be selected for you. You can change any of the subscription limits available to you as well, to better suit your organization’s needs.
Signup Sheet Design
Yes. In the Signup Sheet Design tab of the selected event, select the slot position and then modify the number of volunteers for that slot position.
Yes, you can add a logo already defined in the Organization or Event as the Organization Logo or the Event Logo. If you don’t already have an image defined for the Event, go into the Event Settings tab | Logo sub-tab and click on “Set Logo…” Here you can input a URL to a website where your Logo is located, or you can click on Select to upload a new image from your computer. Then you can use the variable [EVENT_LOGO] to place it on your Signup Sheet.
To add the Organization or Event Logo, go into the Signup Sheet Design tab and click on the Top Instructions button. Then, in the Variables menu, select[ ORGANIZATION_LOGO] for the Organization Logo, or [EVENT_LOGO] for the Event Logo.
Custom Prompts is a feature that allows you to define extra prompts that will be requested when a participant signs up for a slot.
To view the training video on how to create custom prompts, click here.
NOTE: Custom Prompts will appear after the required prompts Email, First Name, and Last Name.
Yes, you can hide tasks where all of the slots in the task happened in the past. Slots that happened int he past will still be displayed in the same task with other current slots, but they will not have a Volunteer button.
To make sure this works
-
Under the Settings tab | Display sub-tab check the option “Hide old tasks.” Then press Save.
-
You must put in the correct dates into the field designated for DATEs and NOT just in the text fields of headers. Check the Task Date Option for each task. If it is “Task is on one day” make sure the correct Task Date is provided. If it is “Dates are in Column or Row Headers” make sure the correct date is put into the Date field of the relevant Column or Row headers. If it is “Dates are in each Slot Position” make sure the correct date is put into the Date field of each slot.
To learn more about how dates work in ivolunteer.com, take a look at this video.
To link a volunteer directly to a Task area in your signup sheet, you can add an anchor ID to the Task and link to it.
- Go to the Task under Event Details & Actions > Signup Design. Click More Task Options to expand that section.
- In the Anchor ID field, enter a one-word name for that Task without spaces — for example, concessions or players_signup.
- Save your changes.
- Open the signup Event in a browser tab and refresh it. Now add the anchor ID to the URL preceded by #, e.g.:
https://springfieldfest.ivolunteer.com/charity-basketball#concessions. That URL will be the link to use to jump directly to the Task.
NOTE: Anchor links only work for Task areas that are neither hidden nor in the past.

Reports
Yes, you can select any event and go to the Reports tab. From there, you can choose a Report to run, and then click the check boxes next to the Events to choose which Events you would like to run the Report on.
Use the Report to display a concise view of an event’s volunteer schedule. This should also be your final view of an event’s volunteer plan. The Report displays an event in two formats: 1) The traditional row- column model just like the sign-up sheet and 2) a detailed one slot per row model. If you press the button to open the report in Excel, the report is downloaded into Excel. View the Log to see exactly when volunteers signed up, confirmed, cancelled, or received system warnings. Use the Log to research any difficulties that could arise in the process of signing up volunteers, such as where a volunteer, who failed to confirm, attempted to volunteer.
The Administrator can view this information in the Activity Log tab of the Event. Additionally, the Administrator can view the Activity Log report available in Reports.
Under the Organization page click on the Reports Tab, select the Sign In Sheet Report, the Signup Sheet, or the One Slot Per Row Reports, and under the Options, click on the button next to “Include unfilled slots” as well as any other criteria you would like to have on the report. Click on the events you would like to run the report on, and then click on the Run Report button at the top of the page.
Go into the Reports tab, and select the Name Badges report. Choose the format, PDF or Excel spreadsheet; the Sort/Group option, Name or Date; the Page Size, Avery 5390 or Avery 5395; and the Date Range. Then choose from these options to display on the Name Badges:
- Show event name
- Show task name. Pages are separated by task so if, for example, your tasks were booths or stations, you could send people to the task station to receive their name badge
- Show participant first name. This is on by default.
- Show participant last name. This is on by default
- Show participant title
- Show logo
- Nameless badges. A badge with no name you might use for walk-ins. Clicking on Nameless badges will deselect participant name options and prompt for the number of badges you would like printed per sheet. Deselecting will return participant name options to default.
Organization and Event Settings/Configuration
The Organization has default Settings, and each Event has its own copy of Settings. When you add a new Event, the new Event’s Settings are inherited from the Organization’s Settings, but can be tailored as needed for the Event. When you copy an Event, the Settings for that event are also copied. This means that Settings for any Event can be modified without affecting any other Event’s Settings or the Organization’s Settings. Likewise, modifying the Organization Settings will not affect any existing Event. A good practice is to modify the Organization’s Settings as needed early on, so that any new Events will have Settings tailored for the Organization. This can reduce the amount of work required to set up a new event.
General Questions
ivolunteer.com is online sign up software that works for volunteer scheduling as well as many other types of sign ups. Volunteer coordinators and event managers use our platform both to sign up participants and to manage and run reports on events.
ivolunteer.com works well on Macs, PCs, Linux, iPads and Smart Phones (our own developers use Macs, PCs, and Linux!). While ivolunteer.com is optimized to work very well in most browsers for both volunteers and administrators, we recommend using Google Chrome for optimal performance for administrators when events get very large (e.g. 1,000+ volunteers).
Volunteers can use just about any browser commercially available that supports javascript, including browsers on many mobile devices like the iPhone, Android and recent versions of Blackberry. For administration of ivolunteer.com, we recommend using current versions of Chrome, Firefox, or Internet Explorer 9 or 10. Google Chrome is our browser of choice and performs extremely well with large events. Chrome can be downloaded here. Internet Explorer 8 and older are NOT supported for administration of events needing more than about 1,000 volunteers.
We offer several resources to help you with ivolunteer.com, including our comprehensive Administrative Help and our growing list of video tutorials.
Please email questions to support@ivolunteer.com. You may also call our support number at 866.826.7926 (dial 2 for support).
ivolunteer.com does not match volunteers to organizations that are running events. We respect the privacy and security of our customer organization and we do not publicly share or advertise any event or volunteer information. It is up to each organization to promote their events hosted on ivolunteer.com to their own pool of volunteers.
No! ivolunteer.com does not display third-party advertisements to our customers or to their volunteers/participants.
Volunteers’ email addresses are only transmitted and visible to the user signed on as an Administrator, and are only used by the ivolunteer.com system to send system-generated confirmation emails. ivolunteer.com will never send unsolicited email or use or share your email addresses in any way. ivolunteer.com will never share, copy or review customers’ databases other than to support technical problems or to backup the system.
In addition, we expect our customers to extend this level of privacy to their volunteers by only using the information for the volunteering purposes for which it was intended. We strongly encourage all of our customers to review and modify their Organization Privacy Statement (under Settings | General | Legal Statements) so that it is clear to volunteers what the Organization’s intention is with keeping volunteers’ information safe and private.
Yes. The system is backed up to avoid a loss in the event of a system failure. You can backup your own individual event information by running a Report or Exporting events to Excel. Be sure to review this topic in the license agreement (available for review in the online checkout process) when you purchase ivolunteer.com.
If you have deleted an event, click on the Restore button within 90 days after removing it to restore it to the state it was in when it was removed.
We currently retain all event structure and volunteer information at least five years for active accounts at least one year for inactive accounts, because some customers renew seasonally.
Yes. Specify different start and end dates for your event. Each task can then be assigned to a different date within the start and end dates.
Yes, we expect to be working on upgrades as long as there are ways to make things easier for our customers. Customers are upgraded automatically as new features become available.
Auto-complete, which is on by default, allows a volunteer to just enter their email address when signing up for a slot. The rest of their information, including any custom fields, is automatically filled. This also works from the Administrator’s side, by entering the email address of a volunteer, the rest of their information will be filled in.
Also on the Administrator side, you can add volunteers from your Database. To learn more about the Database, go here.
General Administration Questions
By default, accounts are set to manual renewal and will expire at the end of the subscription term. You will not be charged anything further unless you choose to renew.
New customers can start with a free trial to evaluate ivolunteer and may cancel a paid subscription within 30 days after purchase for a pro-rated refund. (Click to read our full Terms of Service.) None of the subscription fee is refundable after 30 days. Contact us to request a refund.
79ware LLC may delete your data 30 days after your subscription expires. However, unless you request otherwise, we may save your data up to twelve months after your subscription expires so that you may later reactivate it without losing your data. Data retention allows for seasonal use of ivolunteer.com — for example, for an annual event. If you would like to ensure that your data is retained for up to one year, please contact us.
Auto-complete, which is on by default, allows a volunteer to just enter their email address when signing up for a slot. The rest of their information, including any custom fields, is automatically filled. This also works from the Administrator’s side, by entering the email address of a volunteer, the rest of their information will be filled in.
Also on the Administrator side, you can add volunteers from your Database. To learn more about the Database, go here.
Yes, ivolunteer.com is designed to allow your volunteers to sign up themselves instead of having them call or email you. You will be able to link from your website to your organization’s page on ivolunteer.com.
We are occasionally asked to add support for sending text messages in addition to or instead of email. Text messages are something that we are still considering. However there are two challenges with texting. One is that bulk texting is much more expensive than e-mail so we would probably have to charge extra for this; there is no such thing as “reliable unlimited free texts” when it comes to sending texts in bulk. The second challenge is that U.S. law requires that volunteers opt-in to receive texts, and this appears to be more strict than with e-mail. Administrators would not be able to simply send a volunteer a text until the volunteer indicates that he or she is willing to accept texts from ivolunteer.com. As more phones seem to support e-mail the number of requests to send texts has seemed to diminish. With that said, if enough customers continue to ask for this we may look more closely for a solution.
Run a Participants Report across all events you’re interested in totaling the hours for. You can do this by selecting an Event and going to the Reports tab and choose the Participants Report. To learn more about Reports, check out our FAQ on Reports, or view our Training Video.
Each slot position has an hours field associated with it. Volunteers can access this on their participant page which can be reached by using the link in the Confirmation Email they were sent when they signed up for the Event. Additionally, Administrators can run a report on this information.
The first person to sign up for a slot will have the slot locked for ten (10) minutes. After ten minutes it is possible that someone could take the slot, although until someone else does the original person can still confirm. Once the slot is confirmed, they can’t lose the slot unless they cancel the slot or an Administrator cancels them.
We also have a feature called auto-confirm. By default, once someone has confirmed one time, we place a cookie (a small packed of information) into their browser that says this person is confirmed. The next slot they go to sign up for can then be auto-confirmed, meaning that they get the slot right away without having to get a confirmation email again, assuming they signed up for the second slot on the same computer and browser as the first.
As the Administrator using the event’s Manage tab to add a volunteer, you can begin typing someone’s name or email into the email field for suggestions. Down arrow to the desired suggestion and then hit the enter key to auto-fill the rest.
You can also add participants from the Database by clicking the “Add From DB” button in the Event Manage tab. Any participant who has signed up for an event with your organization in the past can then be added to a new event. Learn more about the Database with our database FAQs, or these videos.
ivolunteer.com currently allows volunteers to self-cancel a slot they have signed up for, and then sign up for another slot. A cancelled slot automatically becomes available again to other volunteers.
A volunteer can cancel themselves if the Administrator has elected to allow Self Cancellations (Event menu | Details tab). The Administrator can cancel any volunteer from the Manage tab in a selected event by clicking on the volunteer’s name and then clicking the Cancel button.
Yes, in your Event, under the Details tab | Dates section, there is a dropdown menu of your options for Self Cancellation, including “Self Cancellations Are Not Allowed,” “Midnight Following the Task/Slot Date(s),” “Midnight Just Before Task/Slot Date(s),” 12 hours prior, daily increments, etc.
Yes, the FCC CAN-SPAM ACT says that we have to provide a way for recipients to opt-out from receiving unwanted email messages. Additionally this policy helps to keep ivolunteer.com mail from being blocked by email providers.
We can change it for you upon request. If you need to have your Organization Unique ID changed, please contact support at support@ivolunteer.com and provide your first and second choices for an alternate Unique ID.
One way to do this is to go into the Manage tab and add volunteers using an email address designated for that group. Then when you receive the list of volunteers for that group, you can go back into manage and make the changes
A second option is to stagger signups over time. For example, suppose you have three groups: A, B, and C with C being your general pool of volunteers. You can open up the event early for group A first with a password that only group A knows about. When it’s group B’s turn, you can change the password to one that only group B knows about. Then when it’s time for group C (the general pool) you can remove the password requirement. Additionally you can change the number of available slots each time to keep one group from grabbing too many slots.
A third option is to create different events for each group of volunteers that you can either password protect or simply make hidden. Then send each group the link to their signup sheet. Additionally you can designate someone in each of the groups to be an Event Administrator. This way the group can be responsible for signing up everyone in their group.
To see all events, current and past, click the Clear Filters link above your Events list. To see only past events, click on the Filters & Sort Order link above your Events and in the Status Filter dropdown menu select Only Past Events. Additionally, we recommend copying your old event and giving the copy a new start date to reuse old signup sheets. When you copy events, all dates inside the copied event are adjusted relative to the new date. Also, only the structure of the event is copied so you don’t have to clean out all of your volunteers from the old event. If not much has changed, you can be ready to go in minutes!
Check your Task Date Option. If your task date option is:
- Task is on one day, your task will be set on the first day of your event. You can change this by changing the Task Date next to the drop down box
- Task spans Event Dates (no specific date) your event will not show as past as long as the event date is not in the past and there will not be a specific date on the task.
- Dates are in Column Headers, each column will be on the date specified in the Column Header. Edit the column header to supply/change the date for the header.
- Dates are in Row Headers, each row will be on the date specified in the Row Header. Edit the row header to supply/change the date for the header.
- Dates are in each Slot Position, tasks will be on the date specified in each slot. Edit the slot position to supply/change the date for the slot position.
ivolunteer.com never deletes any of your Organization’s information without your consent. We hold all information for at least a year for inactive subscriptions and at least 5 years for active subscriptions. You may need to clear your filters. Above your Events list, you’ll see the heading Events (filtered). To clear your filters, click on the Clear Filter(s) link. Now you can see every single event you are in charge of. To add filters to narrow down your search for a specific event, click on Filters & Sort Order.
To reuse an old Event, just copy the Event. This copies the structure of the event, not the volunteers. Then you can just make small adjustments to the event for the current year. Additionally, changing the event start date will change all of the dates in the event relative to the new start date.
An event will not show up on your main page when any of the following are true:
- The end date of the event is in the past
- The event has not been made active
- The event has been made hidden.
While administering the relevant event, go to the Settings tab | Prompts sub-tab and add a Custom Prompt. Select the Checkbox type and enter text along the lines of “I have read the volunteer requirements” as the description, check the Hyperlink option beside the description and type a link to your PDF. The PDF can be on your own website, or you can press Select to upload it from your computer to ivolunteer.com.
Go into the event you wish to add an agreement to, go into the Settings tab | Prompts sub-tab and add a Custom Prompt. Select the Checkbox type. Add a title of “I agree” and a short description that says “Click here to read the agreement.” Then check the Hyperlink option beside the description and type in a link to the agreement. The agreement can be on your own website, or you can add a PDF by pressing Select and uploading it from your computer to ivolunteer.com.
Go to the Settings tab | Screen Messages sub-tab OR the Signup Sheet Design tab | Instructions button. In the Top Instructions Editor, highlight the text that you want to be the hyperlink, and then press the Edit or Add Link icon. Key or paste the link you wish to use. You can provide a link to your own website, or press Select to upload a file (such as a PDF) to host it on ivolunteer.com.
The date that you put in the Event’s End Date field must be in the future or the current day.
Check your dates for the Event in the Details tab. You may also want to review any dates in your Tasks in Signup Sheet Design.
The first volunteer to submit their information will get it and a lock will be placed on the slot for ten minutes. The other volunteer will receive a message that the slot was just taken.
Yes, if the Administrator does not click the “Activate” button to make the event Active, then volunteers will not be able to sign up for that event until the “Activate” button is clicked. If your event is already Active, you can click the “Deactivate” button to make the event in-active so that volunteers will not be able to sign up.
The Task volunteer limit restricts the number of volunteers able to sign up for a particular task. The Event volunteer limit restricts the number of volunteers for the entire event. The Task limit will automatically be set for the Event limit, and can be changed to a lower number per task if so desired.
Yes, ivolunteer.com is designed to support simultaneous volunteering from multiple computers accessing an event page, including in Kiosk Mode.
Why is ivolunteer.com not requiring volunteers to confirm their commitment when NOT in Kiosk Mode?
After an email address has volunteered and verified once for an Organization, any subsequent sign-ups from that email address from the same browser will be auto-confirmed. That “Verification Required Once” behavior is the default Verification Mode. If you prefer for volunteers (outside of Kiosk Mode) to always receive a verification email that they must confirm, you can change the Verification Mode to “Verification Always Required.” This setting is under Event Settings > Emails. Your choices are: “Verification Required Once,” “Verification Always Required,” and “Verification Never Required.”
NOTE: Using “Verification Never Required” is not recommended for normal use.
Yes, if you add or move rows or columns then volunteers will shift appropriately to remain under the headings they signed up for. Be careful changing headers of rows or columns because volunteers will expect to have signed up under those headings. You cannot remove a row or column if there are volunteers signed up in any of the slots in the row or column you wish to remove.
First, sign the volunteer up for the new slot in the Manage tab. Then, cancel the slot you are moving them from.
NOTE: When adding the volunteer to the slot, just start typing their name in the email box for a list of suggestions. Arrow down to the desired suggestion and hit the enter key to auto-fill their information.
There are known issues with running the Rich Text Editor on early versions of Internet Explorer. Try using Google Chrome or Firefox instead.
Yes, ivolunteer.com has a Restore Event button that allows you to restore any Event for up to 90 days after you have deleted it. It returns all of your settings, preferences and even your volunteers just as you had them before you deleted the event.
Yes, the Restore Event button will restore your entire layout as well as all of your preferences and settings for the Event.
The Restore Event button will restore all volunteers signed up for an Event, even those who haven’t confirmed yet, into the slots they signed up for.
You can add a link to your PayPal account either in the instructions for your organization’s home page, instructions on an event signup page, or as a custom prompt in the volunteer signup screen. However, ivolunteer.com does not currently tightly integrate with PayPal in such a way to guarantee that a payment is made as part of the volunteer signup process. You can at least use the Custom Prompt method to ask the volunteer to check a box indicating that they have made a payment. We do plan to have tighter payment integration in the future.
To add a link to your PayPal account in the event instructions, administer the relevant event, go to the Signup Sheet Design tab and press Instructions. Highlight the relevant text and press the Edit or Add Link icon. Press Save when you are done.
To add a link to PayPal as a Custom Prompt, go to the Settings tab | Prompts sub-tab. Press Add Prompt. Select a relevant Type, for example CHECKBOX. Make the label “I have paid,” make it required, and make the short description “Click here to go to PayPal to pay,” and check the Hyperlink box. A dialogue will appear where you can enter the link to PayPal. Press Save when you are done. By default this custom prompt will appear on the signup screen on all of your tasks. You can selectively remove it form any task under the task’s More Task Options.
When a volunteer signs up for the first time (or the Administrator signs up a volunteer on their behalf) the confirmation email contains a unique link through which that volunteer can access his or her volunteer commitments (and cancel a commitment if you allow self-cancellation). Whenever a volunteer signs up or receives a reminder, that link would typically be included again in that email. A volunteer can also re-send themselves that link by visiting any event they have signed up for.
Your administrator(s) could also create a “registration” event with Custom Prompts for additional information such as address and phone number. You could then either ask your volunteers to sign up using the “Registration Event.” This information can be linked to and viewed in the Organization’s Database, where you can group volunteers and send out emails to the entire Database.
Emails/Reminders
You can use the Re-Send Confirmation Link email (found in the Reminders/Email tab of the Event) or you can re-send them a confirmation notification by clicking on their name in the Manage tab and clicking the Send Confirmation Notification button.
Log in as the Administrator, select an event, go to the Reminders/Email tab. You can add scheduled reminders to happen before the task dates and thank you messages for when the task is over by clicking on the Schedule button. Optionally, you can create a reminder to send now by clicking on the Send Now button.
To schedule an email for an event, go to the Event page and select the event you wish to schedule an email for and go to the Reminders/Email tab. Click the Schedule button. This will pull up your Organization Default email templates. You can further edit them here. When you’re finished editing your templates, you can choose from the Schedule, Send Me a Test Email, Save Template, and Cancel buttons at the bottom of the template.
-
The Schedule button schedules the emails for the time set relative to the date of the slot that was volunteered for.
-
Send me a test email sends a test email to make sure all links, as well as the variables, are configured in a way you like.
-
Save Template allows you to save any changes made to the default template specific to your event.
-
The Cancel button cancels any changes made. The next time you click on the edit or schedule buttons on the Reminders/Email page, the template will revert back to the Organization Default.
Signed in as the Administrator, click on the Reports tab and click on the Participants Report. This will give you a list of all the volunteers for the events selected, as well as their email addresses. You can then select those emails, copy and paste the addresses into the To field in your email program (or into the Bcc field, if you prefer to keep the recipients from seeing each others’ email addresses). Beware that if volunteers signed up for more than one shift, you may want to check and eliminate duplicate email addresses. You can do this manually in your email program, or you can use Excel’s Sort and Filter functions before you copy the addresses into Outlook.
Yes, you can add additional information or instructions per event that will appear in the Confirmation and/or Reminder emails. Select the event, go to the Settings tab | Emails sub-tab and modify the email messages you wish to change and save your changes.
The three most common reasons for email failure are:
- The volunteer provided a bad or misspelled address
- The email was delivered to a spam or junk-mail folder
- The volunteers retrieving email system is using an anti-spam product based on a challenge/response mechanism that ivolunteer.com’s automated email system cannot respond to.
If #1 is the case, please have your volunteer retry with the correct email address. If #2 or #3 are the case, please try to configure your spam filter to not flag email form ivolunteer.com as spam. One way to do this is by adding ivolunteer.com to your email system’s white list. FInally, you can also try using a different email address. The ivolunteer.com staff is constantly working to ensure the highest possible reliability of email delivery.
Yes, the Manage tab for the selected event allows the administrator to add volunteers without needing the volunteer to confirm. The administrator can also cancel volunteers on this tab.
Yes. Under the Events page, in the Settings tab | Emails sub-tab, under the Volunteer Emails heading, there is a dropdown box with three options:
- Confirmation Required Once
- Confirmation Always Required
- Confirmation Never Required
Selecting “Confirmation Never Required” will eliminate email confirmations.
NOTE: We do not recommend choosing “Confirmation Never Required” for normal use.
Administrators/Contacts
Yes, you can create as many administrators as you need. You can control what each administrator can do with permissions. There are four levels of permissions:
- ORGANIZATION level administrators can do everything that the Primary Administrator can do except update information on the Organization Details page.
- EVENT DESIGN level administrators can manage, view reports, create new events, modify the design of assigned events, and assign other event administrators to those events.
- EVENT REPORTING level administrators can manage and view reports of assigned events.
- EVENT MANAGE level administrators can only manage assigned events
To add or edit an administrator, go to Organization and click the Administrators tab.
Only the Event Design Administrator, the Organization Administrator or the Primary administrator can choose who gets Administrator/Contact Notification emails. With the Event selected, go to the Settings tab | Emails sub-tab and check any applicable notifications they wish to receive.
There is no technical limit to the number of Event Administrators you can add. There is a report that shows each Event Administrator and which events they are managing.
Log in using the previous email contact, then go to the Organization page | Details tab and change contact information there. Be sure to hit the Save button when you are done making changes in this tab. The next time you log in, you will need to use the new email address.
Note: Contact support@ivolunteer.com if you need assistance or call 866.826.7926 ext. 2.
Go to your administrative login (i.e. https://your_account_id.ivolunteer.com/admin). Type in the email address on file and then click on Forgot My Password and the password will be emailed to that address.
If you need additional assistance contact support@ivolunteer.com